Core Features
A deeper dive into some of the application basics.
Navigation
SAGE follows a simple navigation system. There is a sticky navigation bar the at top that is always visible. You can use this to get to almost all areas within SAGE:

- The SAGE logo and image on the far left is a link to the homepage.
- Next we have dropdowns and links to various pages. These link to the main features within SAGE like API integrations, monitoring tools, developer tools, and various resources.
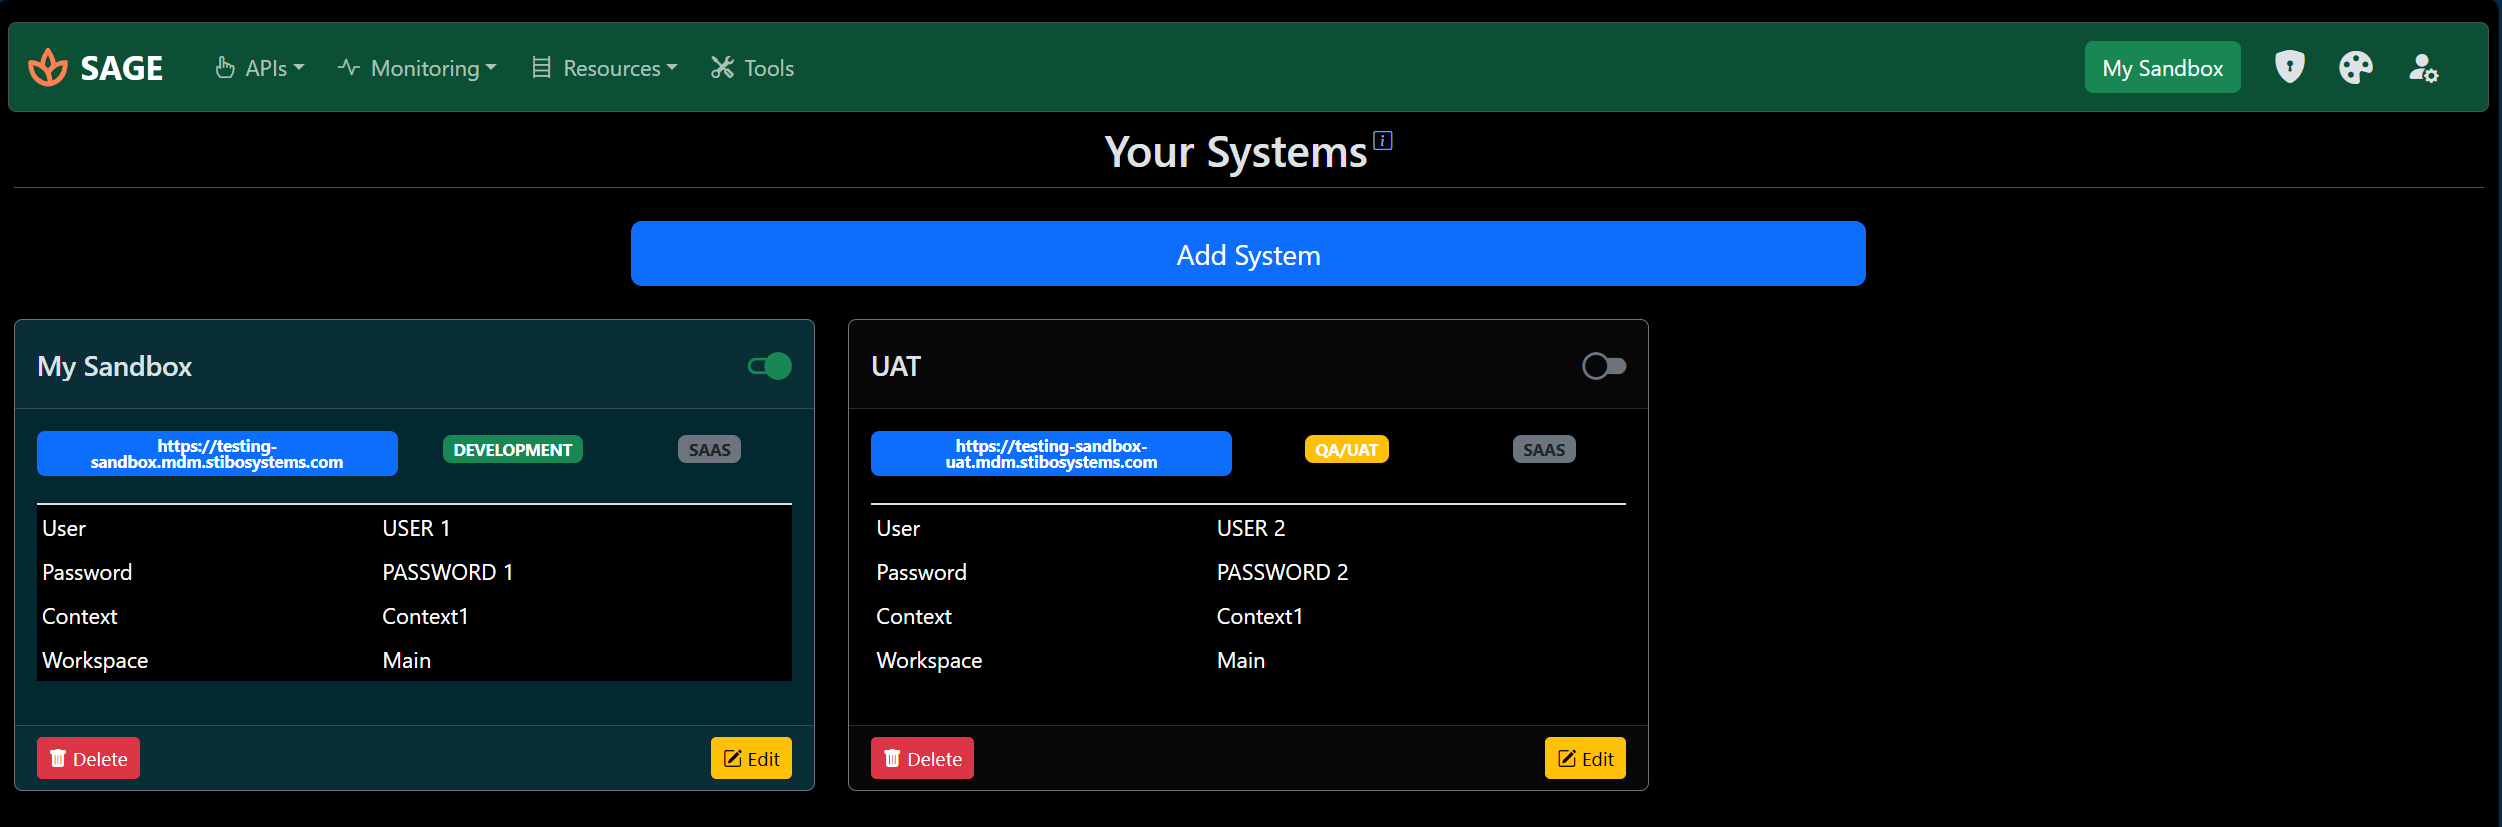
- Next you will see a colored button with the name of the selected system. This is a quick way to check the currently selected system from the 'Systems' page. This box is color coded based on the type of environment selected for Development, QA/UAT, and Production. Clicking on this button takes you to the 'Systems' page if you want to add/edit systems.
- The next item is a shield icon that takes you to the 'Admin' page. This is only visible to SAGE Admin users.
- Following this is a color palette icon that you can use to toggle the theme of the application between light and dark modes.
- Finally there is a user icon which opens the user details panel. There are multiple options here including a logout button.

Systems
"Systems" are the core functional input needed for SAGE to work. A system is simply a representation of a single STEP environment that you add to SAGE, telling the application where to connect.
If you work with STEP, you likely manage multiple environments like sandboxes, development, testing, and production instances. Each of these is a 'System' in SAGE.
You can navigate to the Systems Page and add each system you work with using the 'Add System' button.
In the form that opens up, fill in the details. Every field shown is mandatory:
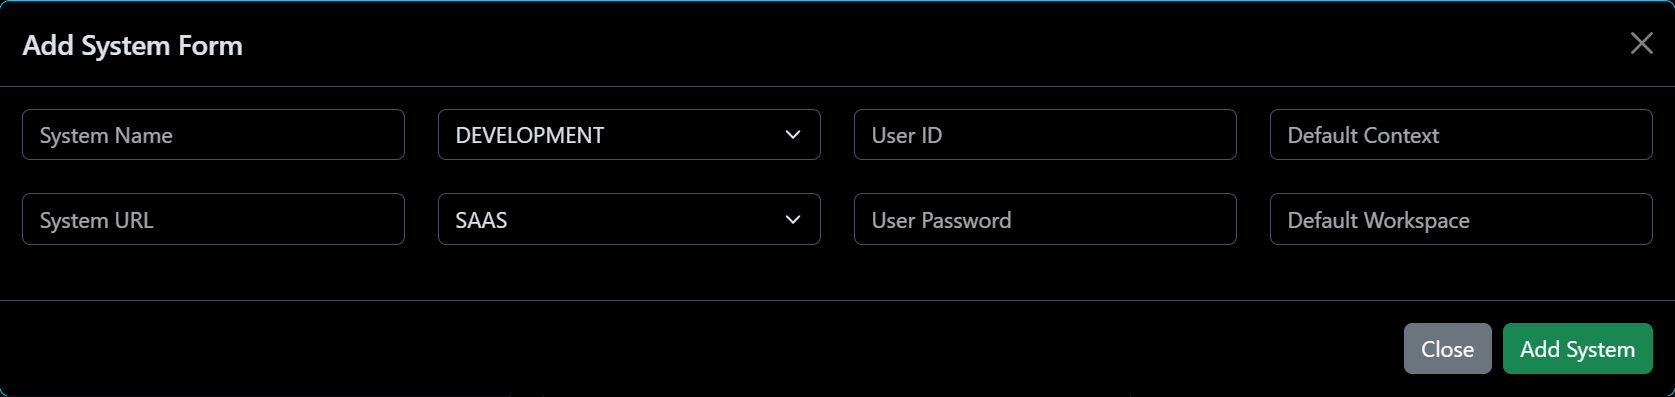
- The System Name can be anything you choose.
- The System URL needs to be a valid url starting with 'https://'
- Select the environment type (Development, QA, or Production)
- Select the deployment type (SaaS or On-Prem)
- Fill in the User ID, Password, Context, and Workspace to be used as defaults when working with APIs. These can be overridden at runtime if needed.
You can add multiple systems and switch between them by selecting any one from the Systems Page using the 'toggle' button at the top right of the card. The selected system will be highlighted with a colored background.
You can also edit an existing added system by clicking the edit button or delete it, as needed.
User
Access to SAGE's features is locked behind a user account. This allows multiple people to use the application and have their own set of stored data (like configured systems).
To create a user account, click on the 'Register' button. It's visible in the homepage or in the User Details panel. Fill in the form to have an account created.
Once registered, you can log in with your credentials and proceed to add and manage your Systems.
There is a special 'Admin' role that is automatically granted to the first user who registers on the system. This role comes with additional options, allowing the admin to monitor SAGE usage and manage application settings.
Privacy
SAGE is designed as a helper application. No analytics or data from your STEP system are collected, with the exception of a few functional data points. And NONE of those are shared with any third party.
These data points are:
- The time when a user was last active for Admin auditing
- The number of visits to a particular page per user. This helps to gauge which features are used most, guiding future development.
- The system details fetched on the homepage, along with the data you input when adding a system, are saved in the database. This is solely to provide convenience to the user; this data is not being used in any other way.